Stop wondering how to make your own Twitch emotes. It’s really not that hard! You can make great Twitch emotes using your selfies or by drawing them from scratch.
You can also buy emotes at great prices online. Read this guide to find out how you can make, buy, and upload your custom Twitch emotes.
Before we jump to the process of making your emotes, let’s go through the basics emote requirements and uploading process on Twitch.
How to Make Twitch Emotes: Basic Rules
Apart from wanting to support their favorite streamers, viewers also subscribe to gain access to unique emotes that they can use in any channel. Twitch Partners and Affiliates can upload unique emotes for Tier 1, Tier 2, and Tier 3 subscriptions.
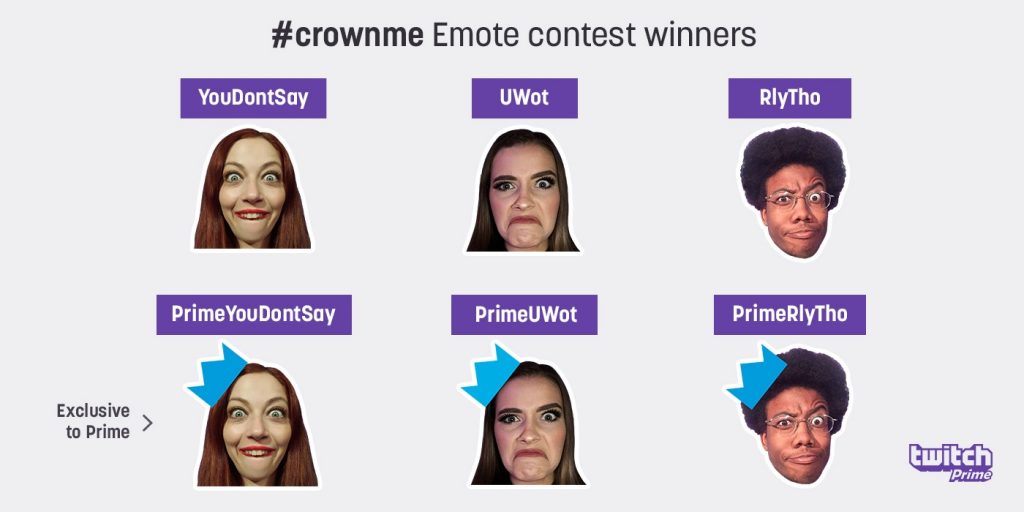
Emotes can be anything from animated figures, to photos, chibis, or basic human expressions. I recommend checking out a few Twitch streamers to see what kind of emotes they are using. You can also go to TwitchEmotes.com to check out the most popular emotes on the platform. The first step in creating your own emotes is researching ideas that could work well on your channel.
Twitch Emote Requirements:
Twitch has a few rules for emote submission. You can read the full Subscriber Emoticon Guide here. Here are a few things you need to remember:
- All emotes must respect Twitch Policies and adhere to the platform’s ToS and Community guidelines.
- Do NOT create emotes with copyrighted material or without the explicit consent of the artist.
- Emotes should not promote hateful conduct, harassment, contain depictions of sexual acts (apart from gasm-style emotes), nudity, illegal drugs, or extreme depections of violence, blood, gore, or death.
- Emotes should also not be vulgar or political.
- Streamers are not allowed to replicate emoticons based on global emotes. The only exceptions are the VoHiYo and Kappa derivatives, for which you can create derivatives.
- Submitting your emote:
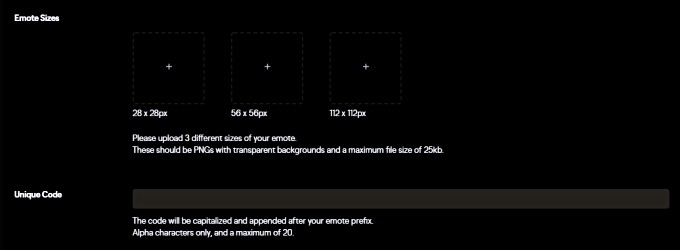
- You must submit three sizer per emoticon: 28x28px, 56x56px, and 112x112px in .PNG format.
- The image’s file size should not exceed 25kb.
- The emote should have a fully transparent background.
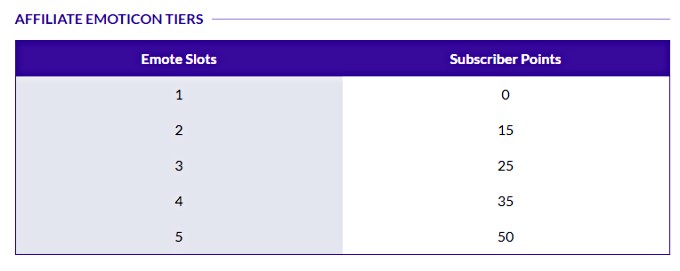
- Affiliates and Partners can unlock additional emote slots by reaching a certain number of subscriber points.
How to Make Twitch Emotes Yourself
If you can’t afford an emote designer, or want to try creating emotes yourself, there are a few things you need to keep in mind. I will teach you how to create
General Tips:
Here are the most important tips that my emote artist shared with me:
- It’s OK to draw inspiration from another artist, or make a similarly themed emote, but make sure you DO NOT COPY an already existing emote.
- Try to create an emote that is relevant to your streamer persona or your community. This will make it more authentic. Combine elements that define you as a caster. That way, your viewers will find plenty of opportunities to use your emote. They will also be more inclined to subscribe to your channel.
- COLORS: the emote’s color palette doesn’t have to be the same as your stream’s overlays. Find colors that look well on both light and dark settings for Twitch.
- Try to create emotes for common expressions or that can be used in many situations. For example, a LUL emote is easy to use in your stream, as well as in other streams. Other examples of commonly used expressions include: rage, crying, hello, thinking, or common global Twitch emotes and memes.
- DETAILS: don’t make your emotes very detailed. Remember that the resolution for an emote ranges between 28 pixels and 112 pixels. Too many details will make the emote difficult to understand on small or mobile screens.
How to Draw your Own Twitch Emotes:
Below is a step-by-step tutorial for creating your very own Twitch emote:
Option 1 – Draw an Emote from Scratch
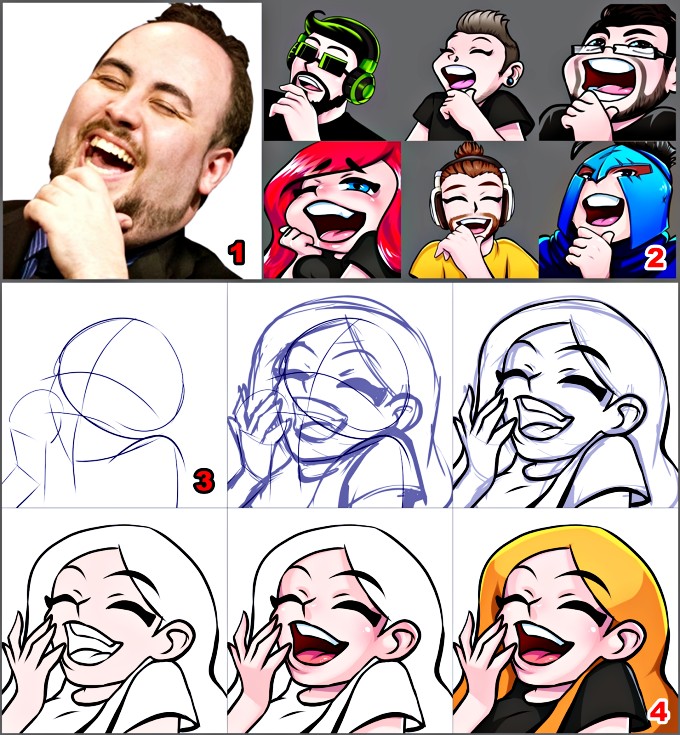
- Always keep in mind the standard emote sizes for Twitch. You will need to upload three versions of your emote in .PNG format at the following sizes: 28x28px, 56x56px, 112x112px. The file size can also not exceed 25kb.
- Choose a reference photo for your drawing. This can be an expressive selfie, another emote you want to draw inspiration from, or a sketch. Find a few other reference photos and add them to your workspace.
- You can draw emotes using tools such as Photoshop, Gimp, PhotoTool SAI, etc.
- Sketch out your version of the emote and decide on its most important features. Do sketching on a different layer.
- Reduce the opacity of the sketch and define the outline of the emote on a new layer. Hide the other layers.
- Start adding base colors to your emote then detail the colors with highlights and shadows. Don’t go too much into too many details! Keep your emotes simple.
- Once you are done, save an original version of the emote and delete the background.
- Resize according to Twitch’s uploading standards and save the emote in the three different sizes.
Option 2 – Create an Emote from a Selfie
Creating an emote from a photo is a budget-friendly solution. Some of the best global emotes, like the ResidentSleeper, LUL, NotLikeThis, or DansGame are WutFace are also made from images.
Here’s a great video tutorial that will show you exactly how to make a Twitch emote using one of your photos:
- Take a close-up selfie of the expression you want to recreate. Make sure you are using good light and capturing the angle that you want. If you’re struggling, ask a friend for help.
- Upload the photo to your computer and cut-out the background, so that only your face remains. Edit the contrast and colors to make it more clear.
- Test the emote with Twitch-Contrast. If everything looks good upload the emote through the Twitch platform.
Buy Twitch Emotes Online
1. Buy emotes on Fiverr
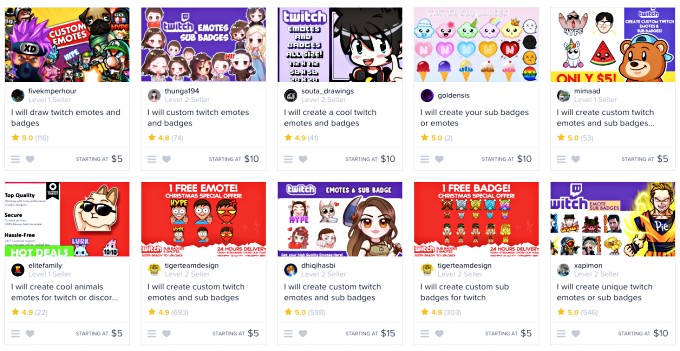
I bought my first ever Twitch emote three years ago, from Fiverr. It was five dollars and I think it was a great deal. The emote turned out great. Although I have my own artist now, there are a few Fiverr gigs I recommend:
- 1 Twitch Emote OR Sub Badge for $15 (3 emotes or 4 sub badges for $40),
- Custom Twitch Emotes or Sub Badges
- Twitch Emotes and Sub Badges for $10, delivered in 24 hours
- (Top Rated Seller) Express Custom Emotes & Badges for $15/each
- Kawaii Anime-style Emotes for $20/each
- Premium quality emotes and badges for $65/2 emotes.
It’s a good idea to work with an artist if you can afford one. First of all, purchasing an emote won’t cost you a fortune. Budget gigs start at $5-10 dollars per emote. The average cost for a good emote is around $15-$25 and you can also get premium ones for over $50 per emote.
Artists have more experience with emotes and can visualize your idea better. They also know how to optimize the emote for smaller screens.
When choosing an emote artist you should try to find a good balance between the quality of work and the price. Make sure the designer also has a basic understanding of Twitch’s ecosystem. Here are a few things you should look for before hiring an artist:
- Emote portfolio
- Reviews from other buyers
- Price
- Delivery time
- Number of edits included in the price
2. Find artists on Social Media
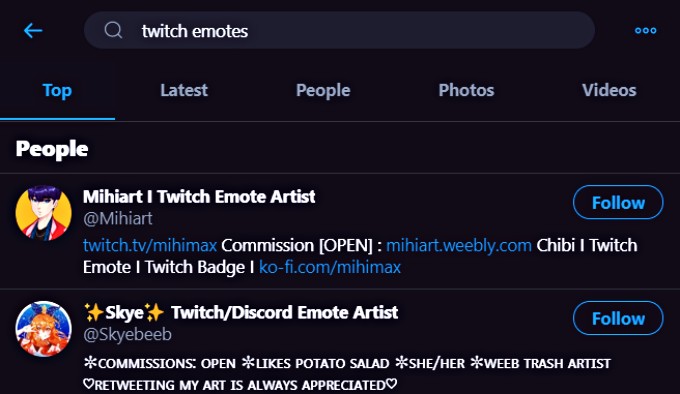
You can easily find emotes by going to Twitter and searching for “twitch emotes” or “twitch emote commissions.” Artists generally include their specialty and whether or not they’re accepting commissions in their name, or bio.
If you don’t want to collaborate with a stranger, you can simply search for “new emote uploaded,” “new emote live,” and other similar searches. Streamers generally announce their latest emotes and tag their artists in their tweets.
Another option would be to go straight to a streamer that has nice emotes. Simply ask him/her who the artist is and whether or not you can reach out to them.
If you’re searching for emote artists on Instagram, I recommend browsing the #twitchemotes hashtag.
3. Ask your Friends
As a streamer, you are probably involved in many communities and Discord channels. Sometimes, finding a great emote artists means reaching out to one of your streamer buddies. Don’t be afraid to DM someone for help! 🙂
Uploading your Emote to Twitch:
- Log in to your Twitch Account and navigate to the “Creator’s Dashboard” from your profile icon.
- From the Stream Manager go to Preferences -> Affiliate / Partner and select Emotes.
- Here, you can manage the emotes for all your subscriber tiers. You can also check your progress for receiving extra emote slots as a partner or affiliate. Tier 1 affiliate slots are capped at five.
- After uploading the appropriate sized emotes, you must assign a unique code that will follow after your emote prefix. Hit save and wait for the emote to be approved. Partners in good standing will have their emotes automatically approved.
Conclusion
Now you know how to make your own Twitch emotes and, hopefully, also upload them easily. I believe emotes are a great incentive for subscribers. Partnered streamers can now also emotes to different bit tiers now, so there are even more reasons to invest in great art.
If you can’t make your own emotes, or want to take your stream to the next level, working with a talented artists is a great investment. Even if you spend $30 for a good emote, overtime you will get all that money back (and more) from subscriptions.
Leave a Reply